Welcome to RealFlight!
Browse RF9, RF9.5 & RF9.5S Articles by Category
This Knowledge Base contains the articles pertaining to RF9, RF9.5 & RF9.5S. The links below will be used to navigate these items.
Pre-Sales
As with a desktop PC, you must ensure your laptop meets or exceeds all the System Requirements for the version of RealFlight you intend to use. Since RealFlight is 3D accelerated, it is especially important that the display device on your laptop is designed to support graphics-intensive 3D games. Laptops intended for 3D gaming will be built with a video card rather than an integrated graphics processor. Gaming-capable laptops are typically marketed as "gaming laptops" or "multimedia laptops".
For more information regarding the expected performance of your laptop, please contact your laptop manufacturer.
RealFlight is compatible only with Microsoft Windows and cannot be used with Mac OS/OSX operating systems. But if you can run Windows on your Macintosh computer, you should also be able to run RealFlight.
Apple now offers a program called "Boot Camp" that does allow Macintosh users to dual-boot Windows with Mac OS/OSX. For help installing Windows onto your Mac using Boot Camp, contact Apple Support.
An integrated graphics processor is a low power substitute for a video card and is not intended for resource intensive 3D games. Integrated graphics use shared system memory (RAM) for video memory and the central processor (CPU) for graphics processing. A video card has the dedicated video memory (VRAM) and graphics processor (GPU) needed for handling 3D games.
For more information regarding the expected performance of the display device on your laptop or desktop computer, please contact your system manufacturer.
The warranty period for all RealFlight products is 90 days from the date of purchase. The warranty covers product defects and any damage that occurs during shipping and handling from the original purchase.
Please note: The warranty is not transferrable, and does not cover second hand purchases.
Under the terms of the Limited Use Software License Agreement, one copy of RealFlight is licensed for one user. While RealFlight is licensed for one user, that user can definitely have it installed on more than one machine at a time. There is no need to deregister a computer.
In the event the user is not able to activate or register on a second machine, they can contact Software Support to request a registration reset for their number. This will allow them to re-register from the new computer.
Yes. It is in PDF format, so you may need to get Adobe Acrobat Reader DC software in order to view it.
If you would like to print all or part of the RealFlight 9.x Manual, you can do so with your local printer.
MINIMUM RECOMMENDED SYSTEM
Some graphical features may be disabled. Aerodynamic calculations will remain high quality.
- Windows® 7 or Windows 8 or Windows 10*
- *Administrator access required.
- Intel® Pentium® 1.0GHz or equivalent
- 512 MB RAM
- 10 GB Hard Drive Space
- DVD Drive
- 3D Accelerated Video with:
- 32 MB Dedicated Video Memory
- Full DirectX 9 compliant (Shader Model 2.0 or better)
- InterLink DX, RealFlight® compatible controller, or other Gamepad/Joystick
Internet connectivity required for activation and to download additional content and updates.
Optimal System:
For best graphical performance
- Dual Core 2.4GHz CPU
- 2 GB RAM
- 3D Accelerated Video with: 512 MB dedicated video memory
Multiplayer Requirements:
- Broadband Internet connection
- Computer microphone for voice chat
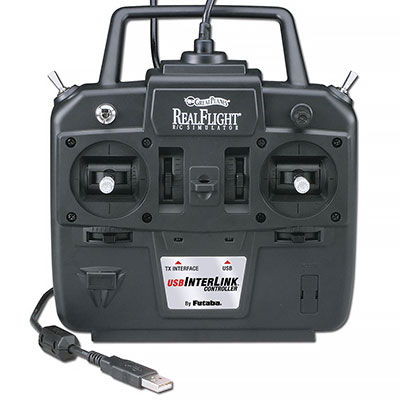
InterLink® DX Controller:
- USB 2.0 Port
- Compatible FM or FM-selectable transmitter (if using the interface mode)
- Note: Connectors and adapters are available seperately for use with the InterLink DX that will make it compatible with the trainer jacks on most Futaba®, Tactic® and all JR®, Spektrum® and Tower Hobbies® systems.
VR Requirements:
- Compatible with some VR sets (available separately). Check manufacturer's requirements for VR system use.
Activation Requirements
Windows is a registered trademark of Microsoft Corporation in the United States and other countries.
You will need to allow Unknown Sources in the Oculus software:
- Open Settings (the Cog Wheel symbol).
- Select General from the options at left.
- Switch on Unknown Sources.
- Start RealFlight 9.x and put on the headset.
RealFlight 9.x is compatible with some VR headsets. At this time, the Oculus Rift and the HTC Vive are known to work. For more information, please check the manufacturer's requirements for the VR headset you intend to use.
If you own a headset other than the Vive or the Rift which has worked with RF9, please let us know. We’ll be glad to look into adding this to the list of RF9-compatible equipment.
The challenge for RC simulators is to deliver a "true", complete environment. Unfortunately, the world is ultimately limited by the size and quality of computer monitors. VR eliminates that limitation. RealFlight comes to life. No matter which way you look, tilt your head, or move, RF9 will relay an exacting simulation of your environment. Take off, and a plane will disappear from view unless you turn to follow it accordingly. In the air, glance down to find the runway.
Installation
RealFlight 9.x displays an Activation Key on your screen ONLY if the software fails to activate automatically across the Internet.
Please note: If you are able to run RealFlight 9.x, the software is already activated. If you are looking to register for access to the program updates, that process is located under the RealFlight 9.x Launcher (see "How do I download the latest update for RealFlight 9.x?"). insert link to article How do I download the latest update for RealFlight 9.x?
If RealFlight 9.x fails to activate automatically, a Product Activation window will appear with the information you need to manually activate the software:
RealFlight Serial: XXXXXXXX-R9-XXXXXXXXXX
Activation Key: A five- to ten-digit number
With the above information, you can create an Activation Code for RealFlight 9.x on the Online Activation page from any computer or smart phone with Internet access, or you can forward your information to Horizon Hobby Software Support so we can create an Activation Code for you.
A downloadable version of RealFlight 9.x is available for purchase from RealFlight.com, HorizonHobby.com, TowerHobbies.com, the Steam Distribution Platform, and participating local retailers.
If your computer does not have a DVD drive you can use an external DVD drive (sold separately), or you can download the RealFlight 9 software at: realflight.com/dlrf9/ (then follow the onscreen directions accordingly).
Upgrade/Update
We will need to reset the registration for your copy of RealFlight. Please complete the support request form.
Once your information has been verified, we will reset the registration. You can then re-register with a new password.
Please note: Horizon Hobby can only reset the registration for the current registered owner. If you received RealFlight secondhand, the original owner will need to grant permission to clear his/her information from the registration. Alternatively, we can accept a verifiable receipt for a secondhand purchase (handwritten receipts cannot be accepted).
You must register from your current installation before you can update. The registration and updating processes are located on the RealFlight 8.x Launcher:
- Open the RealFlight Launcher.
- Select Additional Options.
- Select Registration/Updates.
- From the Online Updating window, select Online Registration.
- Complete all required fields on the Registration Information form and enter a password (twice) at the bottom.
- Select Send Information to complete the registration process.
- You should receive a confirmation that says, "Thank you for registering this software…" Click OK from that message.
- You can now select Update to Latest Version from the Online Updating window to begin the update process.
Some RealFlight 8 owners have been unable to download and install online updates successfully due to virus protection that's active during the attempted update. If these symptoms describe your situation, try the solution that follows:
- You receive error message "KEError 21081: The requested functionality is not available” when you try to update RealFlight.
- One or both of the following files is missing from your computer:
- C:\Program Files (x86)\Common Files\KnifeEdge\CopyLaunch8.exe
- C:\Program Files (x86)\Common Files\KnifeEdge\LauncherHelper8.exe
- You have antivirus software such as McAfee, Bitdefender, or Trend Micro running on your computer and providing some type of real-time/heuristic protection.
You may not be aware that antivirus software is active on your computer, or will have to look hard to find it. But if one or both of the files mentioned above is missing, it's almost certainly due to antivirus software intervention.
SOLUTION: Remove the file(s) listed above as missing from quarantine. Then, try the online update again. Note: You may encounter "KEError 24052" next.
To prevent future occurrences (depending on your level of comfort and technical knowledge), you can either: (1) disable all antivirus software during online updates, or (2) add exceptions for the files/directories above as appropriate.
Unfortunately, we can't provide exact instructions for your specific antivirus software. You may need to refer to its documentation for further assistance.
To update any previous version of the RealFlight software, we suggest purchasing the Software Only version of the simulation. The SKU is: RFL1101.
Some RealFlight 9 owners have been unable to download and install online updates successfully due to virus protection that's active during the attempted update. If these symptoms describe your situation, try the solution that follows:
- You receive error message "KEError 21091: The requested functionality is not available" when you try to update RealFlight.
- One or both of the following files is missing from your computer:
- C:\Program Files (x96)\Common Files\KnifeEdge\CopyLaunch9.exe
- C:\Program Files (x96)\Common Files\KnifeEdge\LauncherHelper9.exe
- You have antivirus software such as McAfee, Bitdefender, or Trend Micro running on your computer and providing some type of real-time/heuristic protection.
You may not be aware that antivirus software is active on your computer, or will have to look hard to find it. But if one or both of the files mentioned above is missing, it's almost certainly due to antivirus software intervention.
SOLUTION: Remove the file(s) listed above as missing from quarantine. Then, try the online update again.
To prevent future occurrences (depending on your level of comfort and technical knowledge), you can either: (1) disable all antivirus software during online updates, or (2) add exceptions for the files/directories above as appropriate.
Unfortunately, we can't provide exact instructions for your specific antivirus software. You may need to refer to its documentation for further assistance.
To update any previous version of the RealFlight software, we suggest purchasing the Software Only version of the simulation.
Graphical
An integrated graphics processor is a low power substitute for a video card and is not intended for resource intensive 3D games. Integrated graphics use shared system memory (RAM) for video memory and the central processor (CPU) for graphics processing. A video card has the dedicated video memory (VRAM) and graphics processor (GPU) needed for handling 3D games.
For more information regarding the expected performance of the display device on your laptop or desktop computer, please contact your system manufacturer.
If the aircraft and flying fields appear as a red and blue shifted double image, your video card is displaying in Stereoscopic 3D rather than standard 3D.
Stereoscopic 3D is an option found on many high-end video cards, and is intended for use with 3D glasses. Stereoscopic 3D creates an extra level of immersion similar to 3D movies. When you view a 3D game in Stereoscopic 3D without the proper glasses, you will see a red and blue shifted double image. Standard 3D is what you see with more traditional 3D games where no special glasses are required.
If you are using a GeForce video card, you can toggle Stereoscopic 3D off using the Ctrl + T keystroke while RealFlight (or any 3D game) is running.
If Ctrl + T does not turn off the effect you are seeing, please contact Horizon Hobby Software Support for further assistance.
Here are some things we would like everyone to know about VR. They are grouped into two different sections based on whether they apply specifically to performance or to the overall experience.
VR Experience
Resolution
The current virtual reality headsets provide roughly half as many pixels as a standard widescreen monitor. VR is not about a high resolution presentation. The hardware isn't there yet. Instead, it's about the experience.
Even if the aircraft doesn't look quite as good as it does on your monitor, it's far more immersive to look around the world freely, tracking your model just like you would at the field. VR lets you do things like glance between your model and the runway when lining up for a landing. If you get away from yourself and lose orientation, no longer can you rely on the movement of the camera as a clue; you really need to fly your way out of it. A simulation should feel as close to the real thing as possible. VR adds a new level of realism that has nothing to do with adding pixels.
PhotoFields and VR
PhotoFields do work in VR, but you won't get the full experience. Because the panorama used to create the PhotoField is monoscopic (2D), the entire simulation has to be rendered that way. This means that you don't get the 3D effect that lets you judge distance, etc. in VR. This might make the aircraft's scale seem strange, and it might make it harder to focus on the aircraft against the background.
The 2D panorama also means that you can't move your head around. Your look direction is tracked, but your position has to be locked.
We know that many users swear by the PhotoFields, so we kept them working in VR. Just bear in mind their limitations.
3D Airports and VR
3D airports (all airports except PhotoFields) allow the full VR experience. In these flying sites, the terrain and all objects are rendered in full stereoscopic 3D. You can even walk around if your physical VR space is big enough. All camera modes are enabled at 3D fields.
Camera Modes and VR
For extra fun, try the different camera modes. Models with cockpits are particularly rewarding. Scaling is applied to cockpit cameras to make the aircraft feel bigger - your head wouldn't fit inside many model canopies! In general, the cockpit VR experience will feel like flying a full-scale aircraft.
Some users may experience VR-sickness with flying camera modes. This is a hazard with any application that moves the camera around, not just RealFlight.
VR Performance
Framerate is Important!
Maintaining 90 frames per second (FPS) is critical for a good experience in VR. The system automatically locks the framerate to 90 fps. If it can't sustain that, it drops all the way to 45 fps (and even further to 22.5 if needed). At framerates below 90 fps you can expect to see some doubling of the image and generally have a subpar experience. Therefore, it is important to check your framerate and adjust settings as needed to achieve 90 fps.
Checking Your Framerate
First, make sure you are running version 8.00.019. Then simply turn on the NavGuides gadget within RealFlight and look at the "Graphics Frames/Sec" readout. Note that some airports and aircraft are more demanding than others. You may find your framerate varies depending on what you are doing and where.
Improving Your Framerate
Improve your framerate by adjusting RealFlight's graphics quality settings. The simplest way to do this is to select Simulation‑>Graphics… from the main menu and choose a lower setting. For finer control, select Simulation‑>Settings… from the main menu, navigate to the Graphics‑>Quality settings group, then tweak individual settings. (Note that changes to some settings do not take effect until the sim is restarted. See each setting's description for more info.)
You should do whatever it takes to achieve 90 fps in VR, even if it means lowering quality settings beyond what you might otherwise find acceptable for regular sim usage. Some of these settings aren't very noticeable in VR and won't be missed. For example, normal maps add a lot of value on a standard monitor, but provide almost no benefit within VR. Turn them off for an easy and painless gain.
"VR Quality" Setting
Within a separate Virtual Reality settings group in the Simulation‑>Settings dialog you will find a "VR Quality" setting. Its name makes it a tempting target when trying to enhance your VR experience, but use it only as a last resort! Lowering that setting will have more of a negative impact on the visual quality than anything you might change in the Graphics‑>Quality group.
That is because the VR Quality setting alters the resolution of the entire image being presented to each of your eyes, which is then scaled up or down to match the physical resolution of your headset's screens. If you lower it, everything is rendered at a smaller size and then stretched to fit (think of it like zooming in), which creates ugly artifacts.
We strongly recommend keeping this setting on High unless you have a compelling reason to change it. On High, visuals are rendered at exactly the right size for the hardware, meaning no scaling occurs.
When Should I Adjust the VR Quality Setting?
- Your graphics card is at the very low end of what is supported and struggles to sustain a desirable framerate even after reducing standard graphics quality settings as described above. Lowering this setting just might give you the last little boost you need to experience VR.
- Your powerful system easily maintains 90 fps everywhere you fly even with all the graphics quality settings cranked up, and you are looking for ways to further improve the visuals. Increasing this setting will result in supersampling of the entire image for each eye, which can add a small amount of antialiasing. Be sure to verify that you still see 90 fps with it raised.
V-Sync and VR
If you are using VR, make sure Vertical Sync is disabled in RealFlight. This setting is located in the Graphics‑>Hardware group.
You will need to allow Unknown Sources in the Oculus software:
- Open Settings (the Cog Wheel symbol).
- Select General from the options at left.
- Switch on Unknown Sources.
- Start RealFlight 9.x and put on the headset.
RealFlight 9.x is compatible with some VR headsets. At this time, the Oculus Rift and the HTC Vive are known to work. For more information, please check the manufacturer's requirements for the VR headset you intend to use.
If you own a headset other than the Vive or the Rift which has worked with RF9, please let us know. We’ll be glad to look into adding this to the list of RF9-compatible equipment.
RealFlight 9.x is compatible with some VR headsets. At this time, the Oculus Rift and the HTC Vive are known to work. For more information, please check the manufacturer's requirements for the VR headset you intend to use.
If you own a headset other than the Vive or the Rift which has worked with RF9, please let us know. We'll be glad to look into adding this to the list of RF8-compatible equipment.
Transmitter
Summary
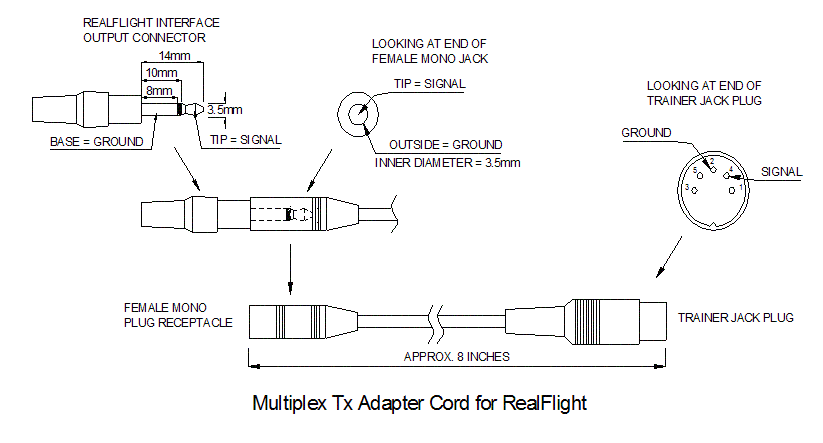
The following is a description for how to assemble an adapter cord to connect a Multiplex transmitter with the parallel port transmitter interface and the InterLink controller for RealFlight. For all instructions, reference the diagram below.
Resolution
Necessary Components
- One 5-pin round male connector compatible with Multiplex transmitter trainer jacks. This should be very similar in style to the plug used on Multiplex trainer cords.
- One female mono plug receptacle, compatible with the dimensions shown for the "RealFlight Interface Output Connector" as shown in the diagram. NOTE: it is important that the female receptacle has an inner diameter of 3.5mm, a depth of 14mm at the tip, and a depth no greater than 8mm for the base.
- Adequate wiring to connect both jacks together. Wire should be copper, having a high strand count. Do not use single strand wire. Two conductors will be required; one conductor for signal connections, one conductor for ground connections.
- Large and small shrink tubing
- Wire strippers
- 60/40 rosin-core electrical solder
- A 40-watt soldering iron
Assembly Instructions
- Cut each conductor to approximately 8 inches in length.
- Strip approximately 1/4 inch of insulation away from each end of each conductor. Twist the bare strands of wire tightly on each wire end.
- Cut enough pieces of shrink tubing to completely cover each solder connection. Make sure to slide the tubes over the wire ends BEFORE making solder connections.
- "Tin" each end of bare wire with 60/40 rosin-core solder and a hot soldering iron. This is simply to apply a small amount of solder onto the bare wire end to prepare it for soldering onto the jacks.
- "Signal" connection:
- Solder one end of the signal wire to pin #4 on the "trainer jack plug". IMPORTANT: this is the pin located at the 2 o'clock position when looking at the end of the plug itself, as shown in the diagram.
- Solder the other end of the signal wire to the center connection on the "female mono plug receptacle".
- "Ground" connection:
- Solder one end of the ground wire to pin #2 on the "trainer jack plug". IMPORTANT: this is the pin located at the 12 o'clock position when looking at the end of the plug itself, as shown in the diagram.
- Solder the other end of the ground wire to the outside connection on the "female mono plug receptacle".
- Slide all shrink tubes over their respective connections. Apply heat with a heat gun or hair dryer to shrink the tubing over the entire solder connection. This will provide a good electrical insulator for the solder connections, and a good strain relief for the physical connection.
InterLink
Summary
The following is a description for how to assemble an adapter cord to connect a Multiplex transmitter with the parallel port transmitter interface and the InterLink controller for RealFlight. For all instructions, reference the diagram below.
Resolution
Necessary Components
- One 5-pin round male connector compatible with Multiplex transmitter trainer jacks. This should be very similar in style to the plug used on Multiplex trainer cords.
- One female mono plug receptacle, compatible with the dimensions shown for the "RealFlight Interface Output Connector" as shown in the diagram. NOTE: it is important that the female receptacle has an inner diameter of 3.5mm, a depth of 14mm at the tip, and a depth no greater than 8mm for the base.
- Adequate wiring to connect both jacks together. Wire should be copper, having a high strand count. Do not use single strand wire. Two conductors will be required; one conductor for signal connections, one conductor for ground connections.
- Large and small shrink tubing
- Wire strippers
- 60/40 rosin-core electrical solder
- A 40-watt soldering iron
Assembly Instructions
- Cut each conductor to approximately 8 inches in length.
- Strip approximately 1/4 inch of insulation away from each end of each conductor. Twist the bare strands of wire tightly on each wire end.
- Cut enough pieces of shrink tubing to completely cover each solder connection. Make sure to slide the tubes over the wire ends BEFORE making solder connections.
- "Tin" each end of bare wire with 60/40 rosin-core solder and a hot soldering iron. This is simply to apply a small amount of solder onto the bare wire end to prepare it for soldering onto the jacks.
- "Signal" connection:
- Solder one end of the signal wire to pin #4 on the "trainer jack plug". IMPORTANT: this is the pin located at the 2 o'clock position when looking at the end of the plug itself, as shown in the diagram.
- Solder the other end of the signal wire to the center connection on the "female mono plug receptacle".
- "Ground" connection:
- Solder one end of the ground wire to pin #2 on the "trainer jack plug". IMPORTANT: this is the pin located at the 12 o'clock position when looking at the end of the plug itself, as shown in the diagram.
- Solder the other end of the ground wire to the outside connection on the "female mono plug receptacle".
- Slide all shrink tubes over their respective connections. Apply heat with a heat gun or hair dryer to shrink the tubing over the entire solder connection. This will provide a good electrical insulator for the solder connections, and a good strain relief for the physical connection.
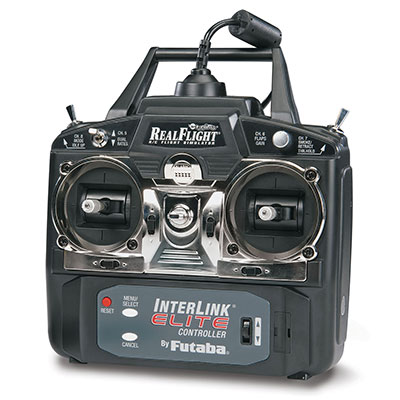
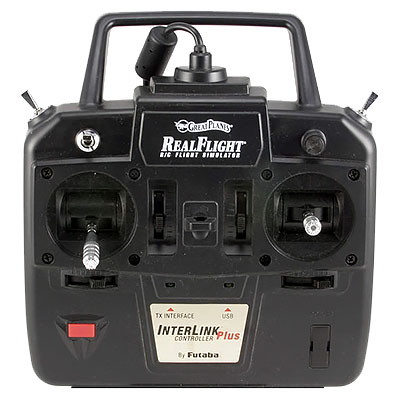
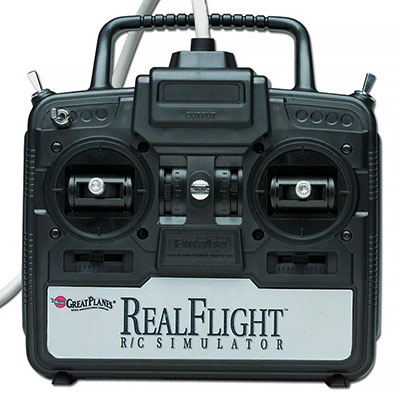
The InterLink DX Controller does not require batteries. The battery door is there only to complete the look and feel of a real R/C transmitter.
Compatibility
As with a desktop PC, you must ensure your laptop meets or exceeds all the System Requirements for the version of RealFlight you intend to use. Since RealFlight is 3D accelerated, it is especially important that the display device on your laptop is designed to support graphics-intensive 3D games. Laptops intended for 3D gaming will be built with a video card rather than an integrated graphics processor. Gaming-capable laptops are typically marketed as "gaming laptops" or "multimedia laptops".
For more information regarding the expected performance of your laptop, please contact your laptop manufacturer.
RealFlight is compatible only with Microsoft Windows and cannot be used with Mac OS/OSX operating systems. But if you can run Windows on your Macintosh computer, you should also be able to run RealFlight.
Apple now offers a program called "Boot Camp" that does allow Macintosh users to dual-boot Windows with Mac OS/OSX. For help installing Windows onto your Mac using Boot Camp, contact Apple Support.
An integrated graphics processor is a low power substitute for a video card and is not intended for resource intensive 3D games. Integrated graphics use shared system memory (RAM) for video memory and the central processor (CPU) for graphics processing. A video card has the dedicated video memory (VRAM) and graphics processor (GPU) needed for handling 3D games.
For more information regarding the expected performance of the display device on your laptop or desktop computer, please contact your system manufacturer.
The Add-Ons Volume 1-5 disks are not compatible for use with RealFlight G4.x, G5.x, 6.x, 7.x., 8.x or 9.x.
The aircraft and airports from the Add-Ons Volume disks were re-developed for compatibility with RealFlight G4.x, G5.x, 6.x, 7.x., and 8.x. That content is available as a free download through the following links:
- Download Add-Ons 1 (RFAOV1_G4.zip)
- Download Add-Ons 2 (RFAOV2_G4.zip)
- Download Add-Ons 3 (RFAOV3_G4.zip)
- Download Add-Ons 4 (RFAOV4_G4.zip)
- Download Add-Ons 5 (RFAOV5_G4.zip)
Download each Add-Ons Volume zipped folder to the desktop of your computer.
Instructions for Windows x64
To install an Add-Ons Volume file into RealFlight G4.x, G5.x, 6.x, 7.x, or 8.x on Windows x64, use this procedure:
Please note: These instructions assume Windows is installed on the “C:” drive on your computer and RealFlight G4.x, G5.x, 6.x, 7.x, or 8.x is installed in the default location.
- Make sure RealFlight is not running or minimized.
- Double left click on the Add-Ons Volume zipped folder (e.g. RFAOV1_G4.zip) to open it.
- Right click on the Add-Ons Volume .dck file (e.g. RFAOV1_G4.dck) and select Copy from the menu that appears.
- On your keyboard, hold down the Windows key and tap the E key (
 + E) to open an Explorer window.
 - In the Explorer window, navigate your C: drive and open the Data folder for RealFlight (e.g. C:\Program Files (x86)\RealFlight8\Data).
- While you are viewing the Data folder, hold down the Control key and tap the V key (Ctrl + V) to Paste the Add-Ons Volume file into the Data folder.
- If prompted for permission, allow Windows to Paste the file into the Data folder.
- Close the Data folder window.
- Close the Add-Ons Volume zipped folder window.
- Run RealFlight.
- The Add-Ons Volume should appear under the Select Aircraft and Select Airport windows (e.g. RealFlight Add-Ons Volume 1).
Instructions for Windows x32
To install an Add-Ons Volume file into RealFlight G4.x, G5.x, 6.x, 7.x, or 8.x on Windows x32, use this procedure:
Please note: These instructions assume Windows is installed on the “C:” drive on your computer and RealFlight G4.x, G5.x, 6.x, 7.x or 8.x is installed in the default location.
- Make sure RealFlight is not running or minimized.
- Double left click on the Add-Ons Volume zipped folder (e.g. RFAOV1_G4.zip) to open it.
- Right click on the Add-Ons Volume .dck file (e.g. RFAOV1_G4.dck) and select Copy from the menu that appears.
- On your keyboard, hold down the Windows key and tap the E key ( + E) to open an Explorer window.
- In the Explorer window, navigate your C: drive and open the Data folder for RealFlight (e.g. C:\Program Files\RealFlight8\Data).
- While you are viewing the Data folder, hold down the Control key and tap the V key (Ctrl + V) to paste the Add-Ons Volume file into the Data folder.
- If prompted for permission, allow Windows to Paste the file into the Data folder.
- Close the Data folder window.
- Close the Add-Ons Volume zipped folder window.
- Run RealFlight.
- The Add-Ons Volume should appear under the Select Aircraft and Select Airport windows (e.g. RealFlight Add-Ons Volume 1).
| EP 1 | EP 2 | EP 3 | EP 4 | EP 5 | EP 6 | EP 7 | EP 8 | |
|---|---|---|---|---|---|---|---|---|
| RealFlight Classic | N | N | N | N | N | N | N | N |
| RealFlight Deluxe | N | N | N | N | N | N | N | N |
| R/C Pilot | N | N | N | N | N | N | N | N |
| RealFlight G2 | N | N | N | N | N | N | N | N |
| RealFlight G2 Lite | N | N | N | N | N | N | N | N |
| RealFlight NexSTAR | N | N | N | N | N | N | N | N |
| RealFlight NexSTAR EP | N | N | N | N | N | N | N | N |
| RealFlight G3.x | C | C | C | C | N | N | N | N |
| RealFlight G4.x | C | C | C | C | C | C | N | N |
| RealFlight Basic | N | N | N | N | N | N | N | N |
| RealFlight G5.x | C | C | C | C | C | C | C | C |
| RealFlight 6.x | C | C | C | C | C | C | C | C |
| RealFlight 7.x | C | C | C | C | C | C | C | C |
| RealFlight 8.x | C | C | C | C | C | C | C | C |
| RealFlight 9.x | C | C | C | C | C | C | C | C |
| RealFlight Drone | N | N | N | N | N | N | N | N |
| RF-X | N | N | N | N | N | N | N | N |
The Expansion Packs are not interdependent. They can be installed in any order or combination into a compatible version of RealFlight.
| AOV 1 | AOV 2 | AOV 3 | AOV 4 | AOV 5 | |
|---|---|---|---|---|---|
| RealFlight Classic | C | C | C | C | N |
| RealFlight Deluxe | C | C | C | C | N |
| R/C Pilot | N | N | N | N | N |
| RealFlight G2 | C | C | C | C | C |
| RealFlight G2 Lite | C | C | C | C | C |
| RealFlight NexSTAR | N | N | N | N | N |
| RealFlight NexSTAR EP | N | N | N | N | N |
| RealFlight G3.x | C | C | C | C | C |
| RealFlight G4.x | N | N | N | N | N |
| RealFlight Basic | N | N | N | N | N |
| RealFlight G5.x | N | N | N | N | N |
| RealFlight 6.x | N | N | N | N | N |
| RealFlight 7.x | N | N | N | N | N |
| RealFlight 8.x | N | N | N | N | N |
| RealFlight 9.x | N | N | N | N | N |
| RealFlight Drone | N | N | N | N | N |
| RF-X | N | N | N | N | N |
The Add-Ons Volume disks are not interdependent. They can be installed in any order or combination into a compatible version of RealFlight.
Please Note: The aircraft and airports from Add-Ons Volumes 1-5 were re-developed for compatibility with RealFlight G4.x, G5.x, 6.x, 7.x, and 8.x. That content is now available as a free download.
| Airplane Mega Pack | |
|---|---|
| RealFlight Classic | N |
| RealFlight Deluxe | N |
| R/C Pilot | N |
| RealFlight G2 | N |
| RealFlight G2 Lite | N |
| RealFlight NexSTAR | N |
| RealFlight NexSTAR EP | N |
| RealFlight G3.x | N |
| RealFlight G4.x | N |
| RealFlight Basic | N |
| RealFlight G5.x | N |
| RealFlight 6.x | C |
| RealFlight 7.x | C |
| RealFlight 8.x | C |
| RealFlight 9.x | C |
| RealFlight Drone | N |
| RF-X | N |
| Helicopter Mega Pack | |
|---|---|
| RealFlight Classic | N |
| RealFlight Deluxe | N |
| R/C Pilot | N |
| RealFlight G2 | N |
| RealFlight G2 Lite | N |
| RealFlight NexSTAR | N |
| RealFlight NexSTAR EP | N |
| RealFlight G3.x | N |
| RealFlight G4.x | N |
| RealFlight Basic | N |
| RealFlight G5.x | N |
| RealFlight 6.x | C |
| RealFlight 7.x | C |
| RealFlight 8.x | C |
| RealFlight 9.x | C |
| RealFlight Drone | N |
| RF-X | N |
| InterLink Controller | |
|---|---|
| RealFlight Classic | N |
| RealFlight Deluxe | N |
| R/C Pilot | N |
| RealFlight G2 | C |
| RealFlight G2 Lite | C |
| RealFlight NexSTAR | N |
| RealFlight NexSTAR EP | N |
| RealFlight G3.x | N |
| RealFlight G4.x | N |
| RealFlight Basic | N |
| RealFlight G5.x | N |
| RealFlight 6.x | N |
| RealFlight 7.x | N |
| RealFlight 8.x | N |
| RealFlight 9.x | N |
| RealFlight Drone | N |
| RF-X | N |
| InterLink Elite Controller | |
|---|---|
| RealFlight Classic | N |
| RealFlight Deluxe | N |
| R/C Pilot | N |
| RealFlight G2 | N |
| RealFlight G2 Lite | N |
| RealFlight NexSTAR | N |
| RealFlight NexSTAR EP | N |
| RealFlight G3.x | N |
| RealFlight G4.x | C |
| RealFlight Basic | N |
| RealFlight G5.x | C |
| RealFlight 6.x | C |
| RealFlight 7.x | C |
| RealFlight 8.x | C |
| RealFlight 9.x | C |
| RealFlight Drone | C |
| RF-X | C |
| InterLink Plus Controller | |
|---|---|
| RealFlight Classic | N |
| RealFlight Deluxe | N |
| R/C Pilot | N |
| RealFlight G2 | N |
| RealFlight G2 Lite | N |
| RealFlight NexSTAR | N |
| RealFlight NexSTAR EP | N |
| RealFlight G3.x | C |
| RealFlight G4.x | N |
| RealFlight Basic | N |
| RealFlight G5.x | C |
| RealFlight 6.x | C |
| RealFlight 7.x | C |
| RealFlight 8.x | C |
| RealFlight 9.x | C |
| RealFlight Drone | N |
| RF-X | C |
| InterLink-X Controller | |
|---|---|
| RealFlight Classic | N |
| RealFlight Deluxe | N |
| R/C Pilot | N |
| RealFlight G2 | N |
| RealFlight G2 Lite | N |
| RealFlight NexSTAR | N |
| RealFlight NexSTAR EP | N |
| RealFlight G3.x | N |
| RealFlight G4.x | N |
| RealFlight Basic | N |
| RealFlight G5.x | N |
| RealFlight 6.x | N |
| RealFlight 7.x | N |
| RealFlight 8.x | C |
| RealFlight 9.x | C |
| RealFlight Drone | N |
| RF-X | C |
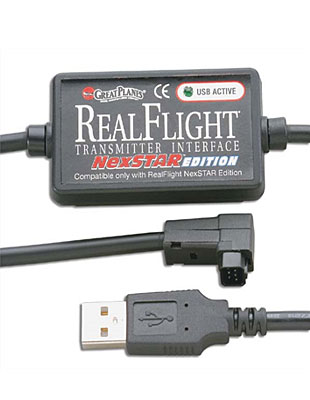
| NexSTAR Transmitter Interface | |
|---|---|
| RealFlight Classic | N |
| RealFlight Deluxe | N |
| R/C Pilot | N |
| RealFlight G2 | N |
| RealFlight G2 Lite | N |
| RealFlight NexSTAR | C |
| RealFlight NexSTAR EP | C |
| RealFlight G3.x | N |
| RealFlight G4.x | N |
| RealFlight Basic | N |
| RealFlight G5.x | N |
| RealFlight 6.x | N |
| RealFlight 7.x | N |
| RealFlight 8.x | N |
| RealFlight 9.x | N |
| RealFlight Drone | N |
| RF-X | N |
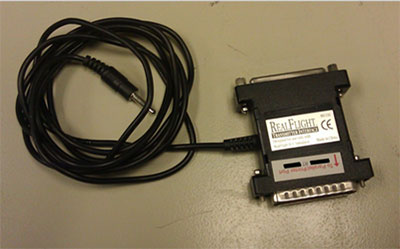
| Printer Port Transmitter Interface | |
|---|---|
| RealFlight Classic | C |
| RealFlight Deluxe | C |
| R/C Pilot | N |
| RealFlight G2 | C |
| RealFlight G2 Lite | N |
| RealFlight NexSTAR | N |
| RealFlight NexSTAR EP | N |
| RealFlight G3.x | N |
| RealFlight G4.x | N |
| RealFlight Basic | N |
| RealFlight G5.x | N |
| RealFlight 6.x | N |
| RealFlight 7.x | N |
| RealFlight 8.x | N |
| RealFlight 9.x | N |
| RealFlight Drone | N |
| RF-X | N |
| R/C Pilot Controller | |
|---|---|
| RealFlight Classic | N |
| RealFlight Deluxe | N |
| R/C Pilot | C |
| RealFlight G2 | N |
| RealFlight G2 Lite | N |
| RealFlight NexSTAR | N |
| RealFlight NexSTAR EP | N |
| RealFlight G3.x | N |
| RealFlight G4.x | N |
| RealFlight Basic | N |
| RealFlight G5.x | N |
| RealFlight 6.x | N |
| RealFlight 7.x | N |
| RealFlight 8.x | N |
| RealFlight 9.x | N |
| RealFlight Drone | N |
| RF-X | N |
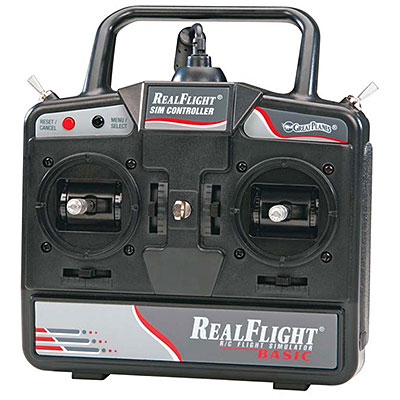
| RealFlight Basic Controller | |
|---|---|
| RealFlight Classic | N |
| RealFlight Deluxe | N |
| R/C Pilot | N |
| RealFlight G2 | N |
| RealFlight G2 Lite | N |
| RealFlight NexSTAR | N |
| RealFlight NexSTAR EP | N |
| RealFlight G3.x | N |
| RealFlight G4.x | N |
| RealFlight Basic | C |
| RealFlight G5.x | N |
| RealFlight 6.x | N |
| RealFlight 7.x | N |
| RealFlight 8.x | N |
| RealFlight 9.x | N |
| RealFlight Drone | N |
| RF-X | N |
| RealFlight Game Port Controller | |
|---|---|
| RealFlight Classic | C |
| RealFlight Deluxe | C |
| R/C Pilot | N |
| RealFlight G2 | C |
| RealFlight G2 Lite | N |
| RealFlight NexSTAR | N |
| RealFlight NexSTAR EP | N |
| RealFlight G3.x | N |
| RealFlight G4.x | N |
| RealFlight Basic | N |
| RealFlight G5.x | N |
| RealFlight 6.x | N |
| RealFlight 7.x | N |
| RealFlight 8.x | N |
| RealFlight 9.x | N |
| RealFlight Drone | N |
| RF-X | N |
| Wired Transmitter Interface | |
|---|---|
| RealFlight Classic | N |
| RealFlight Deluxe | N |
| R/C Pilot | N |
| RealFlight G2 | N |
| RealFlight G2 Lite | N |
| RealFlight NexSTAR | N |
| RealFlight NexSTAR EP | N |
| RealFlight G3.x | N |
| RealFlight G4.x | N |
| RealFlight Basic | N |
| RealFlight G5.x | N |
| RealFlight 6.x | N |
| RealFlight 7.x | C |
| RealFlight 8.x | C |
| RealFlight 9.x | C |
| RealFlight Drone | N |
| RF-X | C |
| Wireless SLT Interface | |
|---|---|
| RealFlight Classic | N |
| RealFlight Deluxe | N |
| R/C Pilot | N |
| RealFlight G2 | N |
| RealFlight G2 Lite | N |
| RealFlight NexSTAR | N |
| RealFlight NexSTAR EP | N |
| RealFlight G3.x | N |
| RealFlight G4.x | N |
| RealFlight Basic | N |
| RealFlight G5.x | N |
| RealFlight 6.x | N |
| RealFlight 7 | N |
| RealFlight 7.5 | C |
| RealFlight 8.x | C |
| RealFlight 9.x | C |
| RealFlight Drone | N |
| RF-X | C |
It is possible to use some goggles for FPV. However, they don't deliver the full, immersive VR experience that the Oculus Rift and HTC Vive offer.
Some FPV goggles include a video input jack, usually HDMI. If your computer supports it, you could plug in your goggles like you would any other monitor and use them while flying in RealFlight. This would give you a similar experience to flying FPV at the field. When using FPV goggles, RealFlight won't detect your head movement or display true 3D.
Both are great systems and RealFlight 8 will look amazing with either. That said, we currently recommend the Rift for three main reasons: increased frame rate, built-in headphones, and lower cost. Both deliver a fully immersive experience that's unmatched by any other simulator on the market.
You will need to allow Unknown Sources in the Oculus software:
- Open Settings (the Cog Wheel symbol).
- Select General from the options at left.
- Switch on Unknown Sources.
- Start RealFlight 9.x and put on the headset.
RealFlight 9.x is compatible with some VR headsets. At this time, the Oculus Rift and the HTC Vive are known to work. For more information, please check the manufacturer's requirements for the VR headset you intend to use.
If you own a headset other than the Vive or the Rift which has worked with RF9, please let us know. We’ll be glad to look into adding this to the list of RF9-compatible equipment.
Both are great systems and RealFlight 9 will look amazing with either. That said, we currently recommend the Rift for three main reasons: increased frame rate, built-in headphones, and lower cost. Both deliver a fully immersive experience that's unmatched by any other simulator on the market.
HowTo
Drivers are the software installed to support the hardware on your computer (e.g. video card or sound card). The drivers for your computer are not supported through Horizon Hobby.
If you need to update a driver for your computer, please contact your computer manufacturer’s technical support.
You can assemble your system information through the RealFlight Launcher. Here is the procedure:
- Open the RealFlight Launcher.
- Select Additional Options.
- Select Technical Support (please allow several seconds for the Technical Support window to open).
- In the upper right of the Technical Support window, place a check mark next to "Include serial numbers in assembled system information…".
- On the lower right of the Technical Support window, select Assemble System Information.
- From the launcheroutput.txt window, select Copy to Clipboard.
- Paste the launcheroutput.txt information into a simple text file (Microsoft's Notepad works best).
- Attach the launcheroutput.txt text file to your email correspondence with technical support.
Drivers are the software installed to support the hardware on your computer (e.g. video card, sound card). The drivers for your computer are not supported through Horizon Hobby.
If you need to repair (e.g. uninstall/reinstall) a driver for your computer, please contact your computer manufacturer's technical support.
The Add-Ons Volume 1-5 disks are not compatible for use with RealFlight G4.x, G5.x, 6.x, 7.x., 8.x or 9.x.
The aircraft and airports from the Add-Ons Volume disks were re-developed for compatibility with RealFlight G4.x, G5.x, 6.x, 7.x., and 8.x. That content is available as a free download through the following links:
- Download Add-Ons 1 (RFAOV1_G4.zip)
- Download Add-Ons 2 (RFAOV2_G4.zip)
- Download Add-Ons 3 (RFAOV3_G4.zip)
- Download Add-Ons 4 (RFAOV4_G4.zip)
- Download Add-Ons 5 (RFAOV5_G4.zip)
Download each Add-Ons Volume zipped folder to the desktop of your computer.
Instructions for Windows x64
To install an Add-Ons Volume file into RealFlight G4.x, G5.x, 6.x, 7.x, or 8.x on Windows x64, use this procedure:
Please note: These instructions assume Windows is installed on the “C:” drive on your computer and RealFlight G4.x, G5.x, 6.x, 7.x, or 8.x is installed in the default location.
- Make sure RealFlight is not running or minimized.
- Double left click on the Add-Ons Volume zipped folder (e.g. RFAOV1_G4.zip) to open it.
- Right click on the Add-Ons Volume .dck file (e.g. RFAOV1_G4.dck) and select Copy from the menu that appears.
- On your keyboard, hold down the Windows key and tap the E key ( + E) to open an Explorer window.
- In the Explorer window, navigate your C: drive and open the Data folder for RealFlight (e.g. C:\Program Files (x86)\RealFlight8\Data).
- While you are viewing the Data folder, hold down the Control key and tap the V key (Ctrl + V) to Paste the Add-Ons Volume file into the Data folder.
- If prompted for permission, allow Windows to Paste the file into the Data folder.
- Close the Data folder window.
- Close the Add-Ons Volume zipped folder window.
- Run RealFlight.
- The Add-Ons Volume should appear under the Select Aircraft and Select Airport windows (e.g. RealFlight Add-Ons Volume 1).
Instructions for Windows x32
To install an Add-Ons Volume file into RealFlight G4.x, G5.x, 6.x, 7.x, or 8.x on Windows x32, use this procedure:
Please note: These instructions assume Windows is installed on the “C:” drive on your computer and RealFlight G4.x, G5.x, 6.x, 7.x or 8.x is installed in the default location.
- Make sure RealFlight is not running or minimized.
- Double left click on the Add-Ons Volume zipped folder (e.g. RFAOV1_G4.zip) to open it.
- Right click on the Add-Ons Volume .dck file (e.g. RFAOV1_G4.dck) and select Copy from the menu that appears.
- On your keyboard, hold down the Windows key and tap the E key ( + E) to open an Explorer window.
- In the Explorer window, navigate your C: drive and open the Data folder for RealFlight (e.g. C:\Program Files\RealFlight8\Data).
- While you are viewing the Data folder, hold down the Control key and tap the V key (Ctrl + V) to paste the Add-Ons Volume file into the Data folder.
- If prompted for permission, allow Windows to Paste the file into the Data folder.
- Close the Data folder window.
- Close the Add-Ons Volume zipped folder window.
- Run RealFlight.
- The Add-Ons Volume should appear under the Select Aircraft and Select Airport windows (e.g. RealFlight Add-Ons Volume 1).
Software Support hours of operation: 8am-6pm Central Time, Monday-Friday.
Email: Please use our contact form.
Mailing Address:
Horizon Hobby
Software Support
1608 Interstate Drive
Champaign, IL 61822
Here are some things we would like everyone to know about VR. They are grouped into two different sections based on whether they apply specifically to performance or to the overall experience.
VR Experience
Resolution
The current virtual reality headsets provide roughly half as many pixels as a standard widescreen monitor. VR is not about a high resolution presentation. The hardware isn't there yet. Instead, it's about the experience.
Even if the aircraft doesn't look quite as good as it does on your monitor, it's far more immersive to look around the world freely, tracking your model just like you would at the field. VR lets you do things like glance between your model and the runway when lining up for a landing. If you get away from yourself and lose orientation, no longer can you rely on the movement of the camera as a clue; you really need to fly your way out of it. A simulation should feel as close to the real thing as possible. VR adds a new level of realism that has nothing to do with adding pixels.
PhotoFields and VR
PhotoFields do work in VR, but you won't get the full experience. Because the panorama used to create the PhotoField is monoscopic (2D), the entire simulation has to be rendered that way. This means that you don't get the 3D effect that lets you judge distance, etc. in VR. This might make the aircraft's scale seem strange, and it might make it harder to focus on the aircraft against the background.
The 2D panorama also means that you can't move your head around. Your look direction is tracked, but your position has to be locked.
We know that many users swear by the PhotoFields, so we kept them working in VR. Just bear in mind their limitations.
3D Airports and VR
3D airports (all airports except PhotoFields) allow the full VR experience. In these flying sites, the terrain and all objects are rendered in full stereoscopic 3D. You can even walk around if your physical VR space is big enough. All camera modes are enabled at 3D fields.
Camera Modes and VR
For extra fun, try the different camera modes. Models with cockpits are particularly rewarding. Scaling is applied to cockpit cameras to make the aircraft feel bigger - your head wouldn't fit inside many model canopies! In general, the cockpit VR experience will feel like flying a full-scale aircraft.
Some users may experience VR-sickness with flying camera modes. This is a hazard with any application that moves the camera around, not just RealFlight.
VR Performance
Framerate is Important!
Maintaining 90 frames per second (FPS) is critical for a good experience in VR. The system automatically locks the framerate to 90 fps. If it can't sustain that, it drops all the way to 45 fps (and even further to 22.5 if needed). At framerates below 90 fps you can expect to see some doubling of the image and generally have a subpar experience. Therefore, it is important to check your framerate and adjust settings as needed to achieve 90 fps.
Checking Your Framerate
First, make sure you are running version 8.00.019. Then simply turn on the NavGuides gadget within RealFlight and look at the "Graphics Frames/Sec" readout. Note that some airports and aircraft are more demanding than others. You may find your framerate varies depending on what you are doing and where.
Improving Your Framerate
Improve your framerate by adjusting RealFlight's graphics quality settings. The simplest way to do this is to select Simulation‑>Graphics… from the main menu and choose a lower setting. For finer control, select Simulation‑>Settings… from the main menu, navigate to the Graphics‑>Quality settings group, then tweak individual settings. (Note that changes to some settings do not take effect until the sim is restarted. See each setting's description for more info.)
You should do whatever it takes to achieve 90 fps in VR, even if it means lowering quality settings beyond what you might otherwise find acceptable for regular sim usage. Some of these settings aren't very noticeable in VR and won't be missed. For example, normal maps add a lot of value on a standard monitor, but provide almost no benefit within VR. Turn them off for an easy and painless gain.
"VR Quality" Setting
Within a separate Virtual Reality settings group in the Simulation‑>Settings dialog you will find a "VR Quality" setting. Its name makes it a tempting target when trying to enhance your VR experience, but use it only as a last resort! Lowering that setting will have more of a negative impact on the visual quality than anything you might change in the Graphics‑>Quality group.
That is because the VR Quality setting alters the resolution of the entire image being presented to each of your eyes, which is then scaled up or down to match the physical resolution of your headset's screens. If you lower it, everything is rendered at a smaller size and then stretched to fit (think of it like zooming in), which creates ugly artifacts.
We strongly recommend keeping this setting on High unless you have a compelling reason to change it. On High, visuals are rendered at exactly the right size for the hardware, meaning no scaling occurs.
When Should I Adjust the VR Quality Setting?
- Your graphics card is at the very low end of what is supported and struggles to sustain a desirable framerate even after reducing standard graphics quality settings as described above. Lowering this setting just might give you the last little boost you need to experience VR.
- Your powerful system easily maintains 90 fps everywhere you fly even with all the graphics quality settings cranked up, and you are looking for ways to further improve the visuals. Increasing this setting will result in supersampling of the entire image for each eye, which can add a small amount of antialiasing. Be sure to verify that you still see 90 fps with it raised.
V-Sync and VR
If you are using VR, make sure Vertical Sync is disabled in RealFlight. This setting is located in the Graphics‑>Hardware group.
To restore the default settings for RealFlight 9.x, follow this procedure:
- Open the RealFlight 9.x Launcher.
- Select Additional Options.
- Select Restore Defaults.
- Click Yes to the Restore Defaults prompt.
- Run RealFlight 9.x. The simulation will launch with the default program settings.
Other
"Dual Rates" refer to altering the rate of servo travel for a control surface on R/C aircraft (e.g. Ailerons, Elevator, and sometimes Rudder). Dual Rates consist of Low Rates and High Rates. Low Rates make the aircraft less responsive (i.e. easier to control), and High Rates make the aircraft more responsive (i.e. harder to control). Dual Rates are typically controlled by a toggle switch on an R/C transmitter.
In RealFlight, the aircraft control surfaces can be set up with Dual Rates. The switch you use to select Low Rates or High Rates depends on the controller or R/C transmitter you are using and personal preference. It is also possible to use a key on your keyboard to control Dual Rates. However, doing so is not realistic to R/C aviation.
Please note: Dual Rates are configured separately for each aircraft.
We will need to reset the registration for your copy of RealFlight. Please complete the support request form.
Once your information has been verified, we will reset the registration. You can then re-register with a new password.
Please note: Horizon Hobby can only reset the registration for the current registered owner. If you received RealFlight secondhand, the original owner will need to grant permission to clear his/her information from the registration. Alternatively, we can accept a verifiable receipt for a secondhand purchase (handwritten receipts cannot be accepted).
Software Support hours of operation: 8am-6pm Central Time, Monday-Friday.
Email: Please use our contact form.
Mailing Address:
Horizon Hobby
Software Support
1608 Interstate Drive
Champaign, IL 61822
The warranty period for all RealFlight products is 90 days from the date of purchase. The warranty covers product defects and any damage that occurs during shipping and handling from the original purchase.
Please note: The warranty is not transferrable, and does not cover second hand purchases.